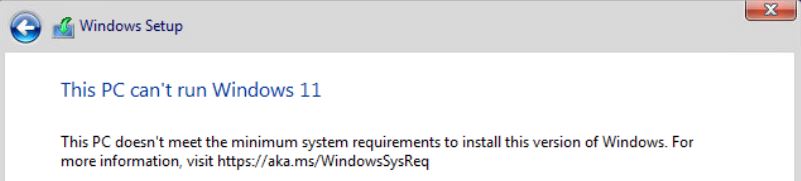
If you run in to the above error when installing Windows 11 as a virtual machine on ESXi (or other virtual platforms) then be aware that there is a workaround.
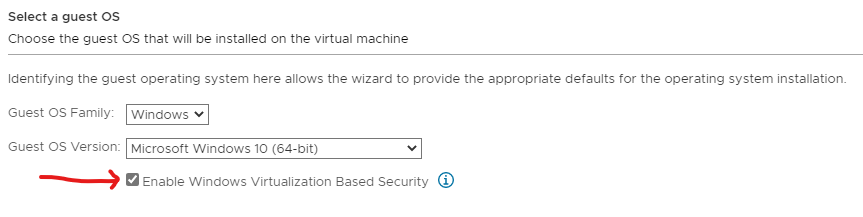
First of all make sure that “Enable Windows Virtualization Based Security” is enabled when the virtual machine is created.
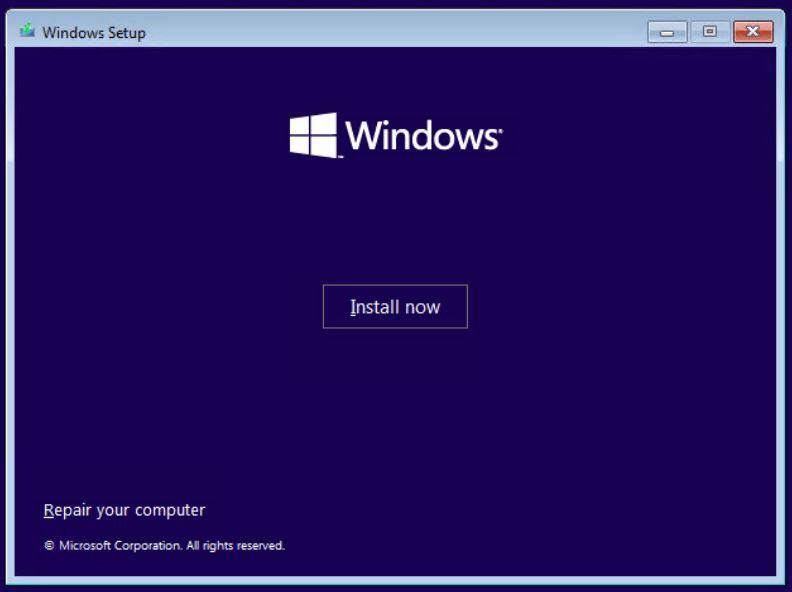
When the setup starts (Showing “Install now”) then press “Shift + F10” – this will open a command prompt on top of the setup window.
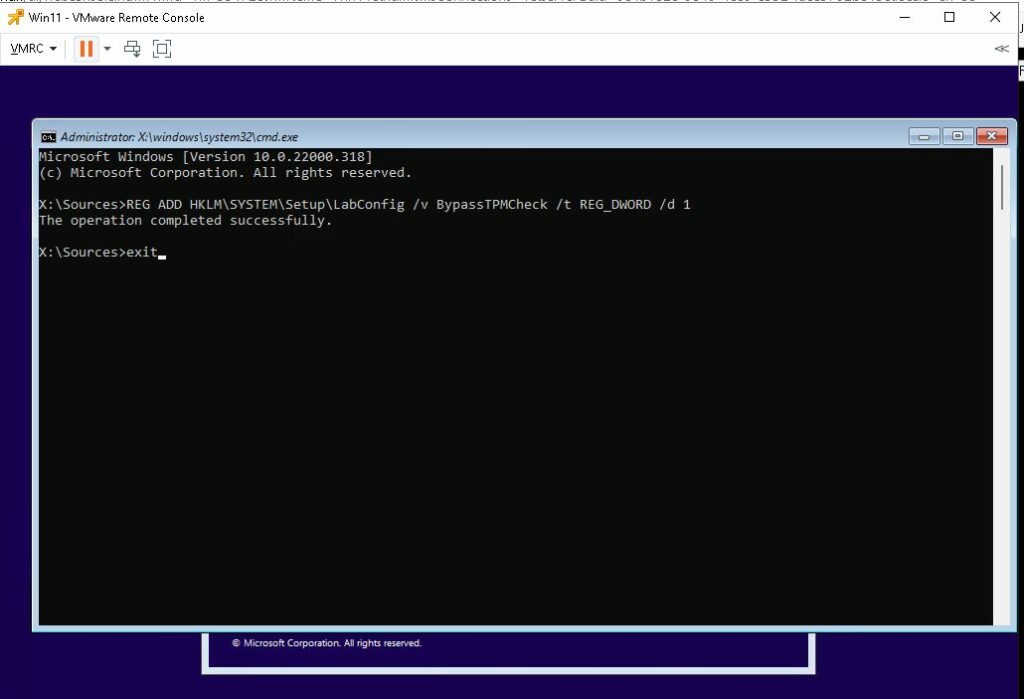
When the command prompt appears type the following command:
REG ADD HKLM\SYSTEM\Setup\LabConfig /v BypassTPMCheck /t REG_DWORD /d 1
Followed by “exit”
Then you can start the installation – but without check for at TPM chip.
Please be aware that Microsoft considers this as a security issue since best practise is to have a TPM v. 2.0 chip when running Windows 11
You can find other guides that show how to enable a virtual TPM chip in VMware but I consider this the fastest workaround but it should only be used in a “Lab” environment
Sir, Excellent article – Thank You! But, I believe the key command should be “Shift” + F10 . Again – Thanks, Nicely Done!
Hi thanks for the feedback 🙂
You are right – its Shift + F10.
I have updated the article